


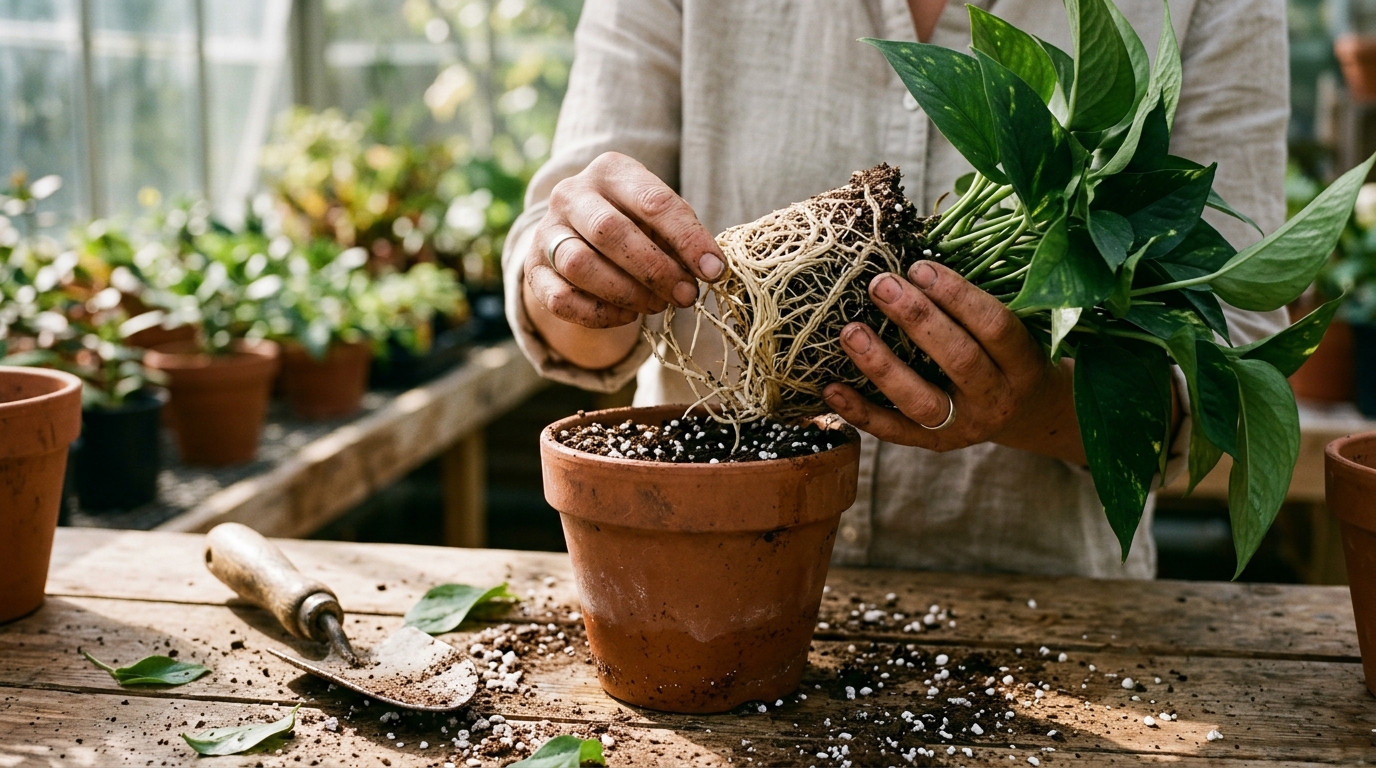
You went to check on your favorite houseplant, and suddenly the leaves look limp, yellow, and soft. The instinct for many gardeners is to assume the plant is thirsty and add more water—making the crisis infinitely worse. Overwatering is the single most common cause of houseplant death worldwide. Fortunately, discovering yellow leaves and soggy soil does not have to be a death sentence. When caught in time, learning how to save an overwatered plant with rapid root-rot triage can bring even severely compromised plants back to vibrant health. Follow this urgent step-by-step rescue plan.
Understanding the Biology: Why Overwatering Drowns Roots
Houseplant roots do not just drink water—they respire oxygen. In healthy potting soil, microscopic air gaps supply root tissues with oxygen. When soil remains saturated with stagnant water, oxygen cannot penetrate. Deprived of air, root tissues suffocate, die, and decompose. Opportunistic anaerobic fungi (such as Pythium and Phytophthora) rapidly attack the decaying root mass, creating the condition known as root rot.
Healthy Roots vs. Rotted Roots: How to Spot the Difference
| Feature | Healthy Root System | Rotted / Compromised Roots |
|---|---|---|
| Color | Bright White, Cream, or Tan | Dark Brown, Grey, or Jet Black |
| Texture | Firm, crisp, and fibrous | Mushy, slimy, and breaks apart with gentle touch |
| Odor | Fresh, earthy, like forest soil | Sour, rotting, swampy, or sulfurous smell |
| Outer Sheath | Tightly attached to inner core | Sloughs off easily leaving a thread-like string |
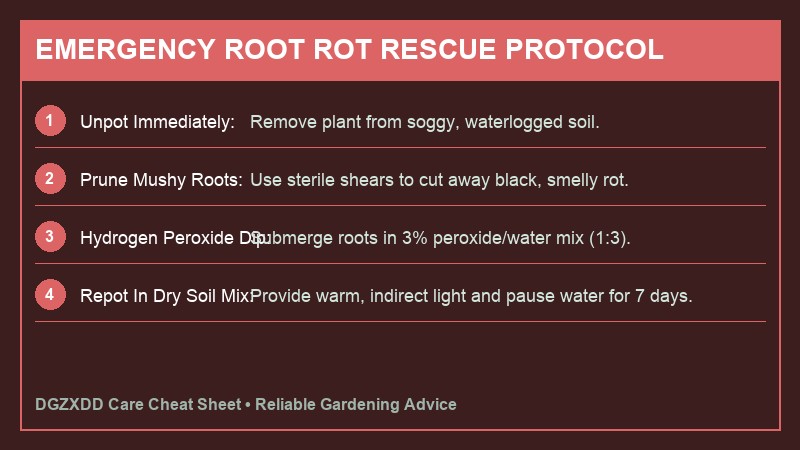
The 5-Step Emergency Rescue Protocol
Step 1: Unpot the Plant Immediately
Do not wait for a waterlogged pot to “dry out naturally on its own.” If root rot has begun, every hour inside soggy soil accelerates decay. Gently unpot the plant, lay it onto clean paper towels or cardboard, and carefully brush away the wet, sour potting mix to expose the entire root system.
Step 2: Rinse and Prune Rotted Roots
Rinse the roots under a gentle stream of room-temperature tap water to wash away old fungus-laden soil. Disinfect a pair of sharp pruning shears with rubbing alcohol. Carefully cut away all brown, black, and mushy roots, cutting back until you reach healthy, firm root tissue. Sanitize your shears between cuts.
Step 3: The Antifungal Hydrogen Peroxide Dip
Prepare an antifungal dip by mixing 1 part standard 3% household hydrogen peroxide with 3 parts clean water. Submerge the trimmed root system in this solution for 5 to 10 minutes. The effervescent bubbling instantly sterilizes fungal spores and delivers a concentrated dose of fresh oxygen directly to healing root cells.
Step 4: Prune Stems to Balance the Root-to-Shoot Ratio
If you were forced to trim away 50% of the root system, the remaining roots cannot support 100% of the top leaf mass. Prune away one-third of the oldest or most damaged leaves. This reduces transpiration demands and allows the plant to focus all its metabolic energy on regenerating new roots.
Step 5: Repot in Fresh Chunky Soil and Clean Pot
Never reuse the old contaminated potting soil. Wash and disinfect the container with soapy water, or select a slightly smaller clean pot with unobstructed drainage holes. Repot using a fresh, highly aerated medium, such as our custom chunky indoor soil mix.
Early Warning Signs: Catching Overwatering Before Rot Takes Hold
Timing is everything when discovering how to save an overwatered plant. The earlier you spot distress signals, the simpler the recovery will be. Look for these progressive stages of water stress:
- Stage 1 (Edema & Blistering): Roots take up more water than the leaves can transpire. Leaf cells swell, creating tiny water-soaked blisters or bumpy raised bumps on the undersides of leaves that later turn brown and corky.
- Stage 2 (Limp, Soft Yellow Foliage): As soil air pockets collapse, leaves lose their firm turgidity. Instead of feeling crisp, yellowing foliage feels soft, clammy, and pliable. Lower older leaves yellow and detach at the slightest touch.
- Stage 3 (Foul Soil Odor & Mold): Stagnant water encourages anaerobic bacterial proliferation. Sniffing close to the container reveals a distinct sour, swampy, or rotting vegetable smell.
- Stage 4 (Stem Blackening & Collapse): Fungal infection travels upward from rotted roots into main stems, turning stem bases dark brown, squishy, and hollow. At this advanced stage, only rapid stem excision can salvage the plant.
Quick First-Aid When Roots Are Still Healthy (The Tampon & Towel Method)
If you accidentally drenched a pot or left it sitting in outdoor rain but root rot has not yet taken hold, you can quickly draw out excess moisture without performing a traumatic repotting surgery:
- Slide the Root Ball Out: Gently tap the pot edges and slide the saturated root ball out intact.
- Wrap in Thick Towels: Wrap the wet soil ball in several layers of clean paper towels or old dry cotton rags. Press gently. The dry absorbent fibers will wick out cups of trapped water within minutes. Replace damp towels with fresh dry ones until water stops seeping out.
- Air Dry on Wire Racks: Place the bare root ball on a wire baking rack in a warm room with gentle circulating fan airflow for 12 to 24 hours. Once the outer soil feels cool and damp rather than soaking wet, slip it back into its clean pot.
Using 3% Hydrogen Peroxide to Disinfect Roots
Standard 3% household hydrogen peroxide (H2O2) is a legendary secret weapon among experienced indoor gardeners for eradicating root rot. When diluted with water, hydrogen peroxide releases an extra oxygen molecule:
- Kills Fungal Spores: It chemically oxidizes and destroys pathogenic fungal mycelium on contact without harming healthy plant cells.
- Aerates the Root Zone: The effervescent bubbling delivers instant dissolved oxygen directly to suffocating root tissues, stimulating rapid cellular healing.
- How to Mix: Combine 1 part 3% hydrogen peroxide with 3 parts room-temperature filtered water. After trimming rotted roots during repotting, dip the remaining root system into this solution for 5 minutes, or use it for the very first light watering after potting into fresh dry soil.
Frequently Asked Questions
Should I prune away damaged leaves immediately?
Yes. Snip off completely yellow, blackened, or mushy leaves with sterilized scissors. These dying tissues will never recover, and removing them allows the plant to channel all remaining energy into regenerating new roots.
How long does it take for an overwatered plant to recover?
Depending on the species and severity of root loss, initial root recovery takes 2 to 4 weeks. Noticeable fresh leaf growth typically resumes within 4 to 8 weeks once the root network re-establishes.
Post-Rescue Care: What to Do in the First 14 Days
The first two weeks following root surgery are critical for long-term recovery:
- Withhold Heavy Watering for 7 Days: Allow the fresh soil to remain slightly dry so pruned root tips have time to callous over and heal without encountering stagnant moisture.
- Provide Moderate Bright Indirect Light: Place the rescued plant in gentle indirect daylight. Avoid harsh sun, which dehydrates foliage faster than healing roots can drink.
- Zero Fertilizer for 6 Weeks: Fertilizer salts will severely burn healing root tissues. Wait until vigorous new leaves sprout before introducing dilute plant food.
What if all roots have rotted away completely?
If an unpotted plant has zero remaining white roots, don’t despair! You can take healthy top stem cuttings with intact nodes and propagate them afresh in clean water or moist perlite. While the original rotted root system may be lost, the plant itself lives on through its vigorous cuttings.
Should I keep the recovering plant in bright light or shade?
Keep recovering plants in gentle, medium indirect light. Intense bright light forces foliage to transpire moisture rapidly, placing excessive strain on the reduced root system. Gentle diffused light allows root cells to regenerate without dehydration stress.
After performing root surgery, protect your plant by reading how to water indoor plants correctly, understanding why are my plant leaves turning yellow, and potting into our aerated best soil mix for indoor plants.
Pathology Reference: Read clinical guidance on Pythium and Phytophthora root rot from Clemson University Cooperative Extension.
Conclusion: Quick Action Saves Lives
Overwatering is a common mistake on every gardener’s journey. What separates successful plant parents from discouraged ones is knowing how to act quickly. By unpotting, sanitizing roots, and repotting in fresh chunky soil, you can rescue your plant from the brink and watch it thrive with renewed vigor.
