


Repotting is one of the most critical milestones in the life of an indoor houseplant, yet it frequently causes intense anxiety for plant parents. Many gardeners worry about tearing delicate roots, choosing the incorrect container dimensions, or causing post-transplant shock that leads to leaf drop. The truth is that repotting does not need to be dangerous. When done correctly with thoughtful preparation, repotting refreshes depleted soil, provides roots with fresh oxygen, and triggers an explosive burst of healthy new foliage. In this comprehensive step-by-step tutorial, you will master exactly how to repot a houseplant without killing it.
Clear Signs Your Plant Urgently Needs Repotting
Plants should never be repotted arbitrarily just because they have been in a pot for a few months. Instead, look for these definitive physical cues that indicate the root system has outgrown its current container:
- Roots Escaping Through Bottom Holes: If dense roots are visibly crawling out of the container’s bottom drainage holes, the root ball has hit its physical perimeter.
- Water Runs Straight Through in Seconds: When soil becomes severely root-bound, dense root mass replaces the soil particles. Water poured onto the surface channels straight down the sides without being absorbed.
- The Plant Easily Lifts as a Solid Block: If you gently lift the base and the plant slips out with soil completely encased in a tight spiral of roots, repotting is overdue.
- Top-Heavy Stunted Growth: If a mature plant stops producing new growth during peak spring months despite adequate light and nutrition, its roots have run out of space to expand.
Selecting the Perfect Container: Avoid the Fatal “Oversizing” Mistake
The most devastating mistake beginners make when repotting is moving a plant into a pot that is dramatically too large. You might think giving a plant a massive pot will give it “room to grow,” but in reality, excess potting soil acts like a wet sponge. The root system cannot drink all the moisture held in the unoccupied outer soil, leading to sour, anaerobic conditions that breed deadly root rot.
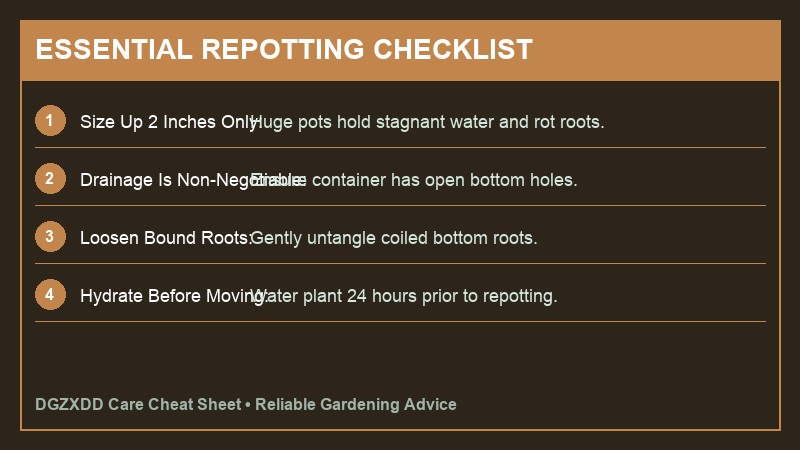
The golden horticultural rule is simple: only size up by 1 to 2 inches in diameter for smaller plants (under 10 inches wide), and by 2 to 3 inches for large floor specimens. For instance, if your plant is currently in a 6-inch nursery pot, step up to a 7-inch or 8-inch container—never a 12-inch pot.
Step-by-Step Repotting Procedure
Step 1: Hydrate the Plant 24 Hours in Advance
Never repot a bone-dry plant or a soaking-wet swampy plant. Water your houseplant thoroughly 24 hours prior to repotting. This ensures the root cells are plump and flexible rather than brittle, drastically reducing breakage while allowing the root ball to slide out smoothly.
Step 2: Unpot the Plant Gently
Do not pull the plant forcefully by its main stems. Instead, support the base of the stems with one hand, turn the pot slightly sideways or upside-down, and gently squeeze the flexible sides of the plastic pot. Tap the bottom firmly until the root mass slides out intact.
Step 3: Inspect and Loosen the Root Ball
Take a close look at the root system. Healthy roots are typically firm and white, cream, or light tan. Use your fingers to gently tease apart tightly bound roots at the bottom and sides. If you see any black, mushy, or foul-smelling roots, trim them away using sterile pruning shears before proceeding.
Step 4: Prepare the New Pot with Fresh Soil
Ensure your new container has functional drainage holes. Add an initial 2-inch base layer of chunky, well-aerated potting mix—such as our recommended custom indoor plant soil recipe. Set the plant centered on top of this layer, making sure the top of the root ball sits roughly half an inch to one inch below the container’s rim to prevent water spilling over when watering.
Step 5: Backfill and Settle the Soil
Fill the empty space around the perimeter with fresh potting mix. Gently tap the sides of the pot to help the soil settle into internal voids. Never pack or pound the soil down with heavy pressure; gentle finger pressure is plenty to secure the plant while preserving critical aeration pockets.
Essential Tools and Materials Checklist Before You Begin
Repotting goes much smoother when you have all necessary gardening supplies organized beforehand. Assembling your workspace prevents panic while your plant’s sensitive root ball sits exposed to dry indoor air:
- The Right Pot: Choose a container that is only 1 to 2 inches larger in diameter than the current pot, equipped with unobstructed bottom drainage holes.
- Fresh Quality Soil Mix: Never reuse depleted old potting soil from discarded plants. Fresh soil supplies clean aeration and essential micronutrients.
- Sterilized Pruning Shears: Wipe cutting edges with rubbing alcohol to safely prune away dead, mushy, or circling root tips.
- Potting Tarp or Old Newspaper: Spread across a table or floor for effortless cleanup.
- Watering Can with Tepid Water: Room-temperature water settles soil particles and hydrates freshly disturbed roots immediately after potting.
- Small Mesh Screen or Coffee Filter: Place over large drainage holes to prevent soil from washing out while allowing excess water to escape freely.
How to Gently Untangle Root-Bound Balls
When a houseplant lives in the same pot for years, roots hit the pot walls and begin coiling in tight, dense spirals. If you simply drop a tightly wound root ball into a larger container without teasing it, the roots will continue circling inward instead of exploring the fresh surrounding soil.
- Use Your Fingers to Massage: Start at the bottom of the root mass and gently loosen the outer layer of roots with your fingertips, spreading them outward like spider legs.
- The Butterfly or Scoring Technique: If the root mass is extremely dense and hard as wood, take clean pruning shears and make 3 to 4 shallow vertical slices (about a half-inch deep) down the outer sides of the root ball, plus a shallow X-cut on the bottom. This triggers fresh adventitious root branching into new soil.
- Prune Dead Roots: Look closely for any dark brown, hollow, or slimy roots. Snip them clean back to healthy firm tissue before repotting.
Frequently Asked Questions About Repotting Houseplants
What is the best time of year to repot houseplants?
Spring and early summer are ideal because plants are entering active vegetative growth. Longer daylight hours and warmer temperatures provide the cellular energy needed to recover quickly and expand roots into new soil.
Should I fertilize immediately after repotting?
No. Never fertilize a freshly repotted plant for at least 4 to 6 weeks. Roots experience microscopic tears during repotting, and synthetic fertilizer salts can burn tender root tips. Allow the root system to settle and heal first.
Why is my plant drooping heavily after repotting?
Mild drooping for 2 to 4 days is normal transplant shock. Ensure you watered thoroughly after repotting and keep the plant in gentle indirect light away from heating vents or direct sunlight until foliage perks back up.
Post-Repotting Care: Preventing Transplant Shock
Even the gentlest repotting creates micro-tears in fine root hairs. To prevent transplant shock, follow these critical aftercare rules:
- Water Lightly to Settle Roots: Give the newly repotted plant a modest drink to settle the soil around root hairs. Ensure all excess drains out completely.
- Shield from Direct Sunlight for 7 Days: Place the plant in gentle, bright indirect light. Avoid harsh direct sun rays, which heat up foliage faster than healing roots can supply water.
- Withhold Fertilizer for 4 to 6 Weeks: Fresh potting mix already contains trace nutrients. Adding concentrated chemical fertilizer to stressed root systems can cause chemical burn on healing root tips.
Never use dense garden dirt when repotting; always prepare our custom best soil mix for indoor plants. If you are repotting climbing species, check out our guide on how to care for Monstera Deliciosa at home.
Expert Reference: Follow step-by-step potting standards from the Iowa State University Extension Repotting Guide.
Conclusion: Give Your Greenery Room to Flourish
Repotting is a revitalizing gift you give your houseplants. By picking appropriate container sizes, handling roots with gentle care, and following proper post-transplant measures, you eliminate stress for both you and your plant. Within a few short weeks, you will be rewarded with fresh green shoots and vigorous, joyful growth.
